About this task
To install Historian in a mirrored environment, first install the primary server:
Before you begin
If you are upgrading from Historian 6.0 or later to Historian 8.0 or later, the web-based clients and the associated data will be lost. Therefore, before upgrading, back up the data using the
uaa_config_tool utility provided in the
Utilities folder of the ISO package. For information, refer to
Migrate User Authentication Data from Historian to Common UAA Service.
Procedure
-
Log in to the Windows Server as an administrator.
-
Start the Historian installation by double-clicking the InstallLauncher.exe file.
This file is found on your ISO or DVD.
-
Click the Install Historian link to start the Historian installation.
The Historian Welcome splash screen appears.
-
Click Next.
The End User License Agreement appears.
-
Read the license agreement and check Accept.
-
Click Next.
The Where do you want to install Historian? prompt appears.
-
To install on the default disk C:\, click Next.
The Override the default Historian data path screen appears.
-
Click Next to use the default path.
The default Historian Data Path is C:\Proficy Historian Data.
-
Provide the URL for UAA Authentication for the Historian Web-based client to connect to Historian Server.
The format of URL is: https://<UAA server host name>:<port number>/uaa. A value is required if you want to connect a web-based client to this server. Replace <port number> with the port number that you want to use with the Historian web-based clients. The default value is 443. If you have changed the public port number for https in the TCP Port Assignments page, you must provide that value here.
-
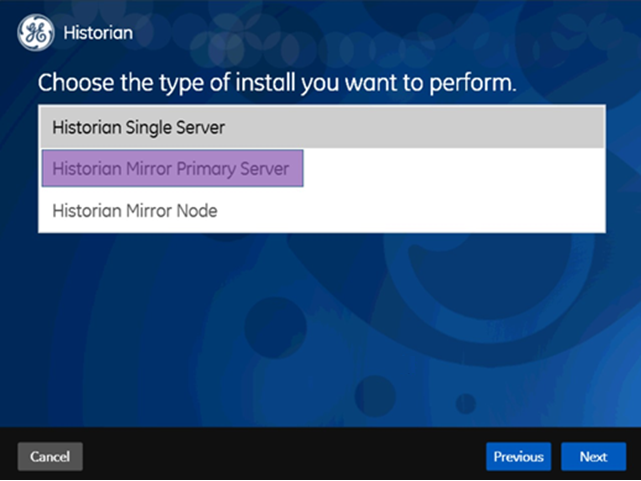
On the Choose the type of install you want to perform screen, select Historian Mirror Primary Server and click Next.
The Ready to Install screen appears.
-
Click Install.
The Installing progress bar appears and the installation proceeds. During the install, a Historian screen briefly appears, and then the InstallShield wizard appears. A progress bar appears while the software is prepared for installation and configuration. The installation process may take some time.
The Installing Proficy Common Licensing screen appears. A progress bar appears while the license is installed. This may take several minutes.
The Historian Installing screen with the progress meter reappears. The Historian SDK Help and Historian Help icons appear on the desktop.
-
Click Exit when the Installation Successful screen appears.
The Reboot Required dialog appears.
-
Click Yes to restart your computer.
This may take several minutes.