Installing a Single Server Historian

Before you begin

If you are changing the role of a Historian Server that was previously a Mirror Node in any other configuration (Single Server or Mirror Primary Server), you must uninstall Historian first. See Uninstalling Historian.
Important: The number of alarms in the Historian Alarm and Events database, and the frequency of new events being added during the installation affects how long the install takes to complete. For example, an install for a system with 1.5 million alarms can take up to three hours to complete.

About this task

To install a single server Historian:

Procedure

  1. Log in to the Windows Server as an administrator.
  2. Start the Historian installation by double-clicking the InstallLauncher.exe file.
    This file is found on your ISO or DVD.
  3. Click the Install Historian link to start the Historian installation.
    The Historian Welcome splash screen appears.
  4. Click Next.
    The End User License Agreement appears.
  5. Read the license agreement and check Accept.
  6. Click Next.
    The Where do you want to install Historian? prompt appears.
  7. To install on the default disk C:\, click Next.
    The Override the default Historian data path screen appears.
  8. Click Next to use the default path.
    The default Historian Data Path is C:\Proficy Historian Data.
    UAA Configuration Screen appears.
  9. Provide the URL for UAA Authentication for the Historian Web-based client to connect to Historian Server.
    The format of URL is: https://<UaaServerHostName>:443/uaa
  10. On the Choose the type of install you want to perform screen, select Historian Single Server and click Next.


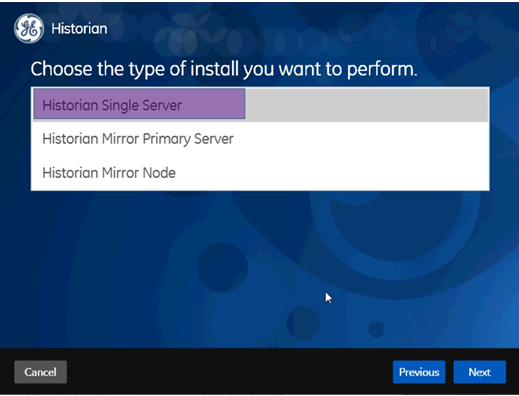
    The Ready to Install screen appears.
  11. Click Install.
    The Installing progress bar appears and the installation proceeds. During the install, a Historian screen briefly appears, and then the InstallShield wizard appears. A progress bar appears while the software is prepared for installation and configuration. The installation process may take some time.
    Note: If you are upgrading from either Historian 6.0 Enterprise or previous releases of Historian 7.2 including any of the service packs, this installation option will remove both Client Manager and Configuration Manager. This will have no impact on your data or use of Historian unless you intend to run a mirrored system. You will be prompted by the system and asked if you want to continue with the install. Choosing Yes will remove Client Manager and Configuration Manager and install a single server architecture. Choosing No will terminate the installation program.
    Note: If you are upgrading to Historian 8.0 from Historian 6.0 or above, the web-based clients and the associated data will be lost. Before upgrading to Historian 8.0, you should take a backup of the data using the uaa_config_tool provided in the Utilities folder of the ISO package.

    The Installing Proficy Common Licensing screen appears. A progress bar appears while the license is installed. This may take several minutes.

    The Historian Installing screen with the progress meter reappears. The Historian SDK Help and Historian Help icons appear on the desktop.

  12. Click Exit when the Installation Successful screen appears.
    The Reboot Required dialog appears.
  13. Click Yes to restart your computer.
    This may take several minutes.