 Historian
Set Up High Availability of the Historian Server
About this task
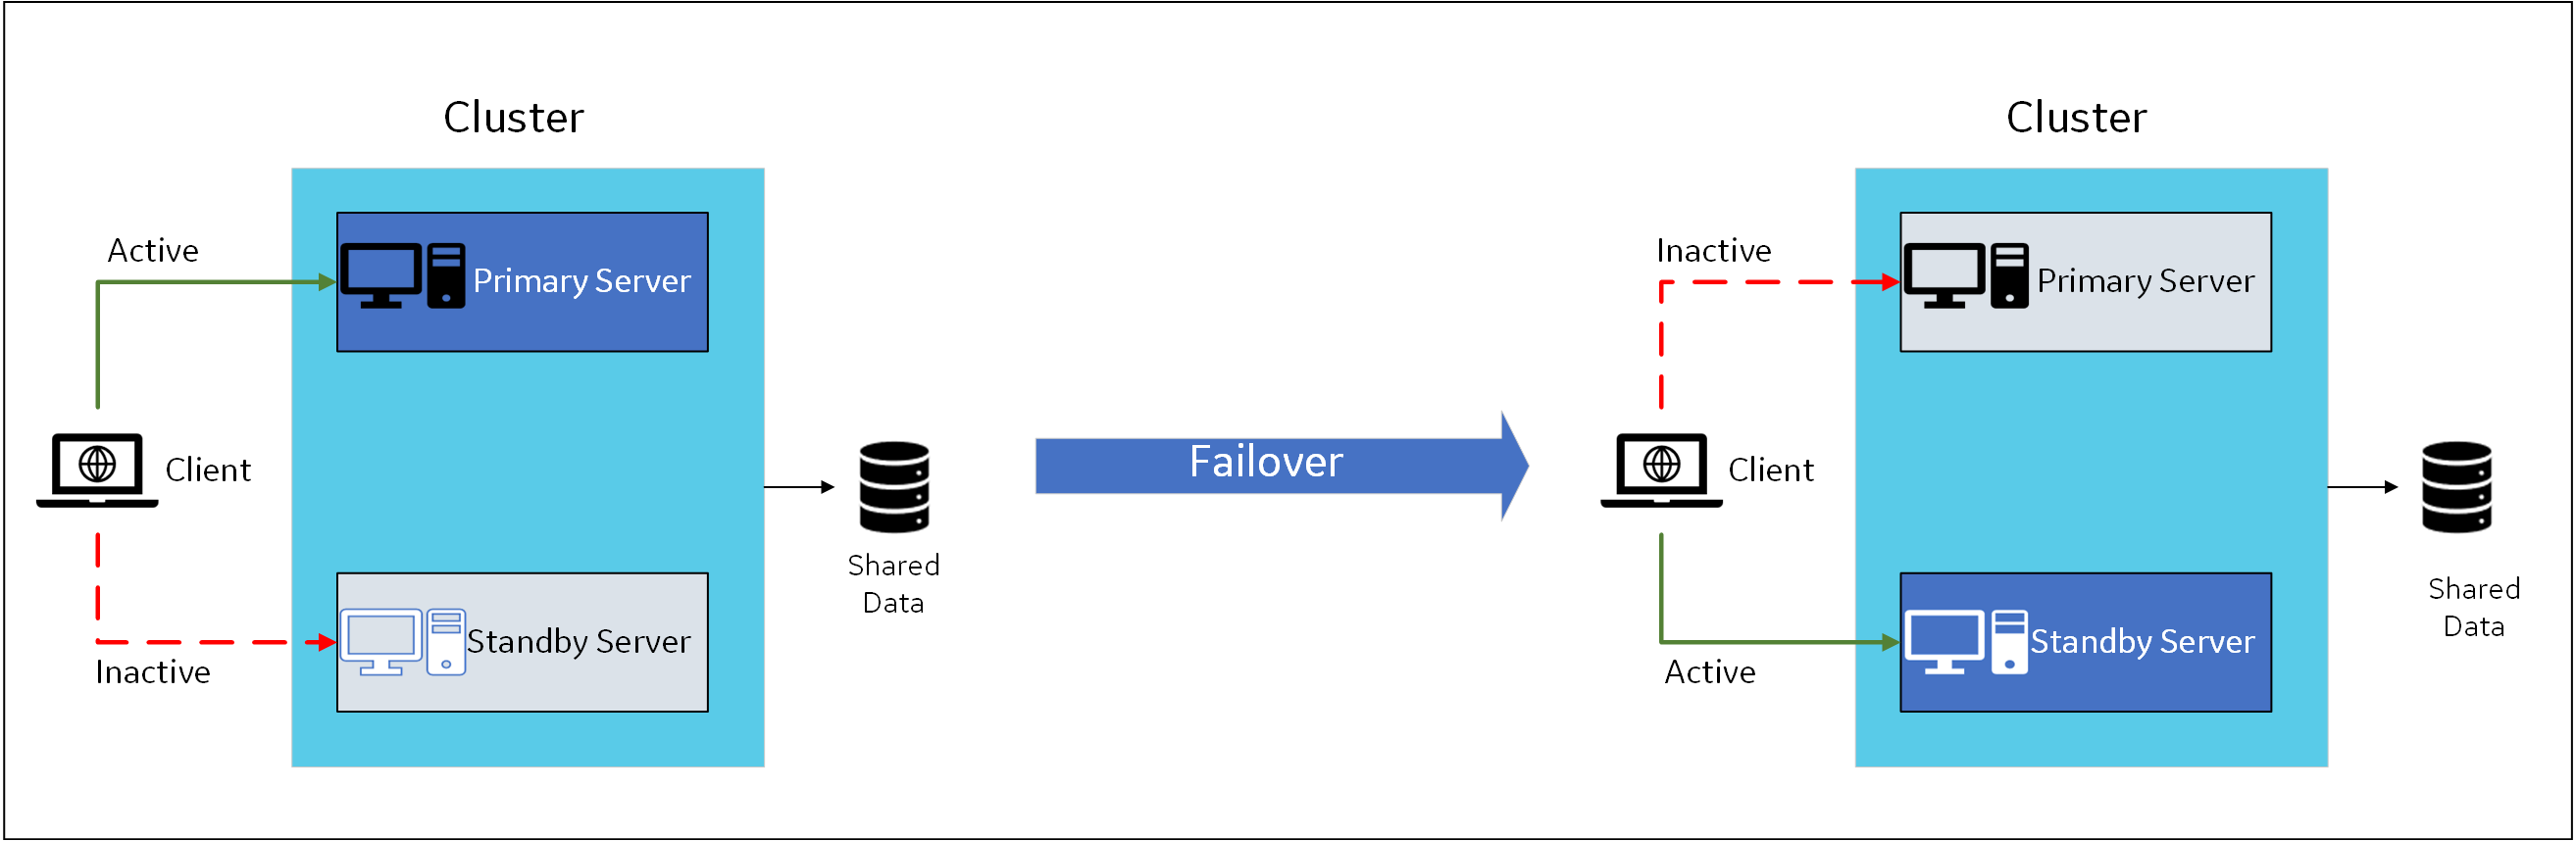
In a cluster environment, multiple servers are installed, which share the same data. Each of these servers is called a node. One of them acts as the primary server, while the others are standby servers. If the primary server is down, one of the standby servers is used. See the following figure for an example.
Note: Cluster supports only domain security.
Before you begin
- Ensure that your network is enabled for multicast traffic.
- Create a shared drive on your network that all the servers in the cluster can access, and create a database folder in that drive.
- On each node that you want to add to the cluster:
- Install the Failover Clustering feature.
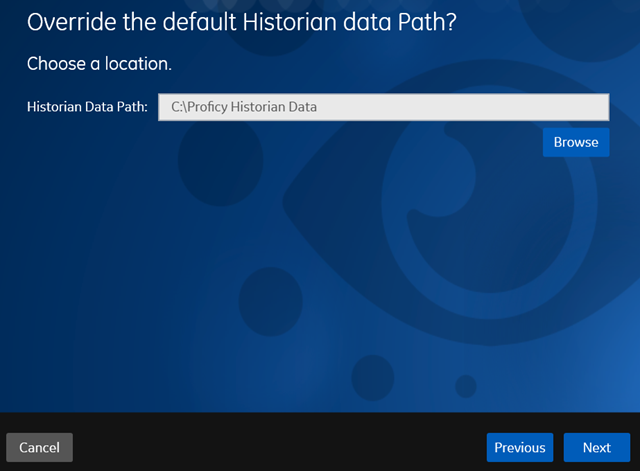
- Install the Historian server. During the
installation, in the Historian Data
Path field, enter the path to the
folder on the shared drive that you have
created.
- If you are upgrading the Historian server on a passive node, an error message may appear behind the installer screen, stating that the Archives directory is not created. You can ignore this message, or you can make the node active before upgrading the Historian server.
Procedure
-
If you have upgraded the Historian server, on all the cluster
nodes:
- Right-click the cluster, and then select .
- If the user-defined resource types are not available, select Add.
- Select <Installation folder of the Historian server>/x64/Server/Historian.dll as the resource DLL path with Historian and AlarmArchiver as both the resource type names and display names.
The Historian servers are now part of the cluster, thus achieving high availability. The remaining steps are required only for first-time installation of the Historian server (not upgrade). - Access the primary node of the cluster.
- Create a failover cluster.
- Add a storage to the failover cluster.
-
Add user-defined resource types, Historian and AlarmArchiver,
to the cluster. These resources are created when you install
the Historian server.
- Right-click the cluster, and then select .
- If the user-defined resource types are not available, select Add.
- Select <Installation folder of the Historian server>/x64/Server/Historian.dll as the resource DLL path with Historian and AlarmArchiver as both the resource type names and display names.
-
Select .
A role is created.
-
Add the Historian application to the cluster:
- Select the role.
- In the Actions section, select .
- Follow the on-screen instructions to add the new Historian resource to the role.
-
Add a client access point to the role:
- Select the role.
- In the Actions section, select .
- Follow the on-screen instructions to add a client access point to the role.
-
Add a storage to the role:
- Select the role.
- In the Actions section, select Add Storage.
- Follow the on-screen instructions to add the storage that you have created in step 3. You can use a storage only once.
-
Add the following dependencies to the Historian resource:
-
Add the Alarm Archiver resource to the cluster:
-
Add generic services.
- In the Summary section of the Historian role, right-click the Client Manager resource, and then select .
- Add the IP address as a dependency, and then select Apply.
- Select General, select the Use Network Name for Computer Name check box, and then select OK.
-
Repeat the previous step for the following services:
- Configuration Manager
- Diagnostics Manager
- Historian Embedded PostgreSQL Database
- Historian Embedded Tomcat Container
- Historian Indexing Service
The services appear under the Historian role.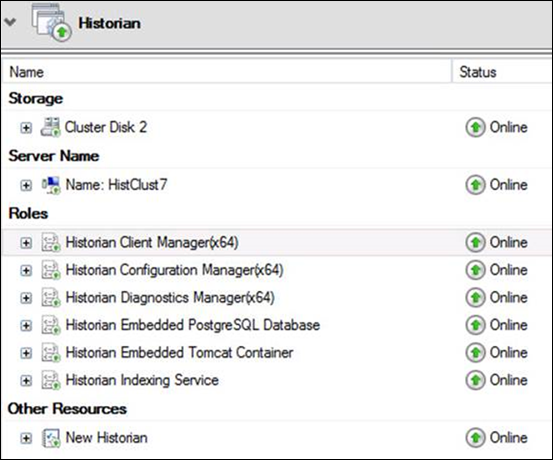
-
Select the Historian role, and then in the
Actions section, select
Start Role.
The Historian servers are now part of the cluster, thus achieving high availability.