 Historian
Add and Configure an iFIX Collector
Before you begin
About this task
- The iFIX collector
- The iFIX Alarms and Events collector
This topic describes how to add a collector instance using Configuration Hub. You can also add a collector instance using the RemoteCollectorConfigurator utility, which does not require you to install Web-based Clients.
Procedure
- Access Configuration Hub.
-
In the NAVIGATION section, select
Collectors.
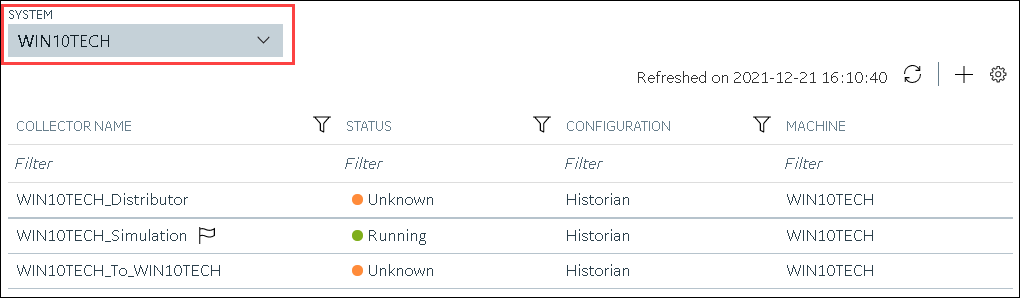
A list of collectors in the default system appears.
-
If needed, select the system in which you want to add a collector
instance.
-
In the upper-right corner of the main section, select
 .
.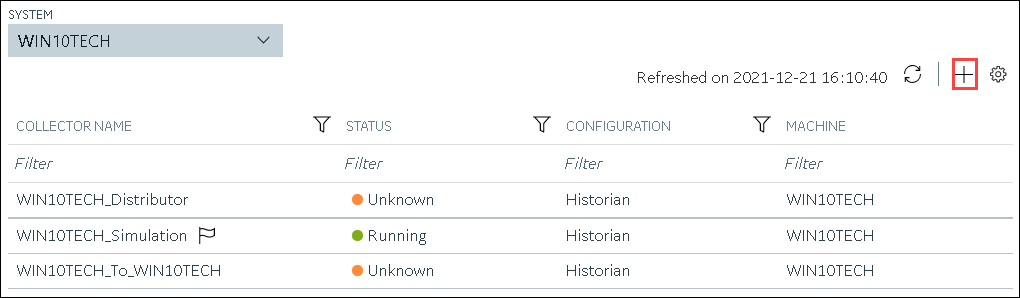
The Add Collector Instance: <system name> window appears, displaying the Collector Selection section. The MACHINE NAME field contains a list of machines on which you have installed collectors. - In the MACHINE NAME field, select the machine in which you want to add a collector instance.
-
In the COLLECTOR TYPE field, select iFIX
Alarms Events Collector or iFIX
Collector, and then select Get Details.
The INSTALLATION DRIVE and DATA DIRECTORY fields are disabled and populated.
-
Select Next.
The Source Configuration section appears. The iFIX SERVER field is disabled and populated.
-
Select Next.
The Destination Configuration section appears. The Historian Server option is selected by default. You cannot select any other option for an iFIX Alarms and Events collector.
- Select the destination to which you want to send data, and then enter values in the available fields. You can send data to an on-premises Historian server or to a cloud destination such as Alibaba Cloud, AWS Cloud, Azure Cloud, Google Cloud, or Predix Cloud. For an iFIX Alarms and Events collector, however, you can only send data to an on-premises Historian server.
-
In the RUNNING MODE field, select one of the following
options.
- Service - Local System Account: Select this option if you want to run the collector as a Windows service using the credentials of the local user (that is, the currently logged-in user). If you select this option, the USERNAME and PASSWORD fields are disabled. By default, this option is selected.
- Service Under Specific User Account: Select this
option if you want to run the collector as a Windows service using a
specific user account. If you select this option, you must enter values
in the USERNAME and
PASSWORD fields. If you have enabled the Enforce Strict Collector Authentication option in Historian Administrator, you must provide the credentials of a user who is added to at least one of the following security groups:
- iH Security Admins
- iH Collector Admins
- iH Tag Admins
-
Select Next.
The Collector Initiation section appears.
- If needed, modify the value in the COLLECTOR NAME field. The value must be unique.
-
In the RUNNING MODE field, select one of the following
options.
- Service - Local System Account: Select this option if you want to run the collector as a Windows service using the credentials of the local user (that is, the currently logged-in user). If you select this option, the USERNAME and PASSWORD fields are disabled.
- Service Under Specific User Account: Select this
option if iFIX is running in a secured mode, or if you want to run the
collector as a Windows service using a specific user account. If you
select this option, you must enter the credentials of the iFIX user in
the USERNAME and PASSWORD
fields. If you have enabled the Enforce Strict Collector Authentication option in Historian Administrator, you must provide the credentials of a user who is added to at least one of the following security groups:
- iH Security Admins
- iH Collector Admins
- iH Tag Admins
You can also configure the collector to start automatically when you start iFIX.
-
Select Add.
The collector instance is added, and appears in the Collectors list. A shortcut is created so that you can open it at a command prompt.If iFIX is not running in a service mode, an error message may appear. However, the collector instance is created; therefore, you can ignore the error message. Although the collector instance does not appear in the list of collectors in Configuration Hub, a shortcut is created. You can run the collector manually at a command prompt or as a SCU task. For more information, refer to About Adding an iFIX Collector Instance.
-
Under Collector Specific Configuration, in the
Nodes to Browse field, enter the mask that you want
to use to select tags when browsing for tags in the collector. The default value
is FIX.
If you want to browse for tags on other iFIX nodes via FIX networking, you can enter the other node name(s) here, separated by commas with no spaces. You must have the iFIX system configured for networking. For more information, refer to the iFIX product documentation on iFIX networking.
Note: If you have modified iFIX node name, then you must also update the value in the Nodes to Browse field before browsing for tags in the iFIX collector.When you browse multiple nodes for tags to add to an iFIX collector, do not use space characters between node names or between the required comma and next node name. All characters after the space are ignored.
-
Under Tag Browse Criteria, specify the tags for data
collection.
Note: If you want to add block or field types to the list, edit the
FixTag.datfile for Historian Administrator you are using. Refer to Editing FixTag.dat File for more information. - If needed, enter values in the other sections.
-
In the upper-left corner of the page, select Save.
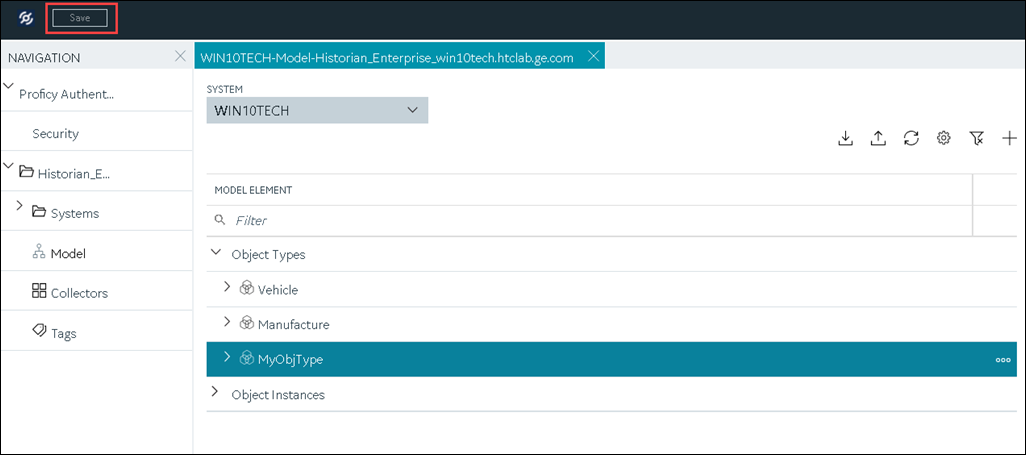
The changes to the collector instance are saved. - If needed, restart the collector.
What to do next
- If you have selected Historian Configuration, specify the tags using Configuration Hub.
- If you have selected Offline Configuration, modify the offline configuration file of the collector. By default, the file is available in the following location: <installation folder of Historian>\GE Digital\<collector name>. For information, refer to Offline Configuration for Collectors. This option is applicable only if you have selected a cloud destination. This option is not applicable to an iFIX Alarms and Events collector.