 CIMPLICITY
Alarm Cast Administrator Tools: Groups
About this task
A Group enables you to control more than one configured destination in a single package.
Adding destinations to groups provides a limitation on the available list of destinations to control, to which destinations a client can send messages.
Procedure
-
Click New Group on the Alarm Cast Administrator toolbar.
A Details tab displays; group options are as follows.
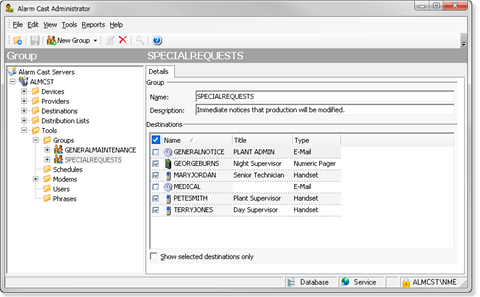
Field Description Group Name Name of the Group. Description Optional Destination Name Checked destination names will be members of this distribution list. Tip: Check Show selected destinations only to filter the destinations list.Click Save.
Results
The Group will now be visible under the Groups folder in the tree view. By selecting the Groups folder, all of the groups will be visible in the working pane.
Registry Setting
A registry setting has been created during the Alarm Cast server installation to enable you to exclude or include various groups in Alarm Cast Client.??This enables you to filter out the list of available destinations that are available for paging in Alarm Cast Client.
Open the Registry Editor (regedit.exe) on the Alarm Cast server.
Select the following:
HKEY_LOCAL_MACHINE\SOFTWARE\NETCON\Alarm Cast\
Client\Config
Double click the Group List key to enter which groups to exclude or include in Alarm Cast Client.
Groups are excluded/included, as follows.
| Exclude/Include | Enter as: |
|---|---|
| Exclude |
???GROUPNAME
|
| Include |
GROUPNAME
|
Example
Two groups have been created in Alarm Cast Administrator:??
- SUPPORT (containing DEST1, DEST2 and DEST3)
- TEST (containing DEST1, DEST4 and DEST5)
| Exclude/Include | Enter : |
|---|---|
| Exclude the groups |
-TEST
This removes DEST1, DEST2, DEST4 and DEST5 from the list.
|
| Include the groups |
SUPPORT
??DEST1, DEST2 and DEST3 will be included in the list.
|


