Create a Tooltip for a CimEdit Object
Procedure
-
Select the General tab.
The Properties screen opens. The bottom portion of the screen is where you create a tooltip.
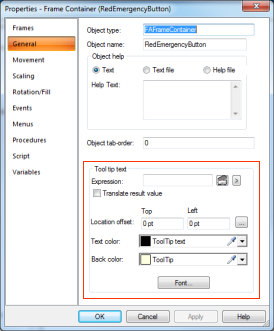
When creating a tootip in CimView, you can:
Component/Option Name Description 
Expression Enter an expression that evaluates to the text you want displayed in the tooltip. 
Expression Editor Opens the Expression Editor. 
More Popup Enter operations, functions and calls to the tooltip. Click on a displayed expression to add it to the tooltip. 
Translate Result Value Decide if the tooltip text and results of any expressions in the tooltip will be translated into the language set in CimView, and configured in the language mapper. 
Location offset Control where the tooltip appears in relation to the graphic object by enter X,Y coordinates. Use this field to keep tooltips from being obscured by other objects on the screen. The default location is to the top-left of the object. 
Offset Helper Control the location of the tooltip by dragging its location rather than entering coordinates. 
Text Color Set the color of the text. 
Back Color Set the background color of the tooltip. 
Font Open a screen with font choices, for example, font type, bold, italics, etc.